To apply styles to report components:
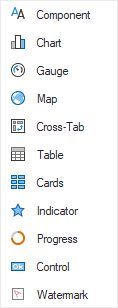
![]() Select the report component manually, select a style from the Style quick menu on the Home tab, or select the desired style in the Component Style properties.
Select the report component manually, select a style from the Style quick menu on the Home tab, or select the desired style in the Component Style properties.
![]()
![]()
![]()
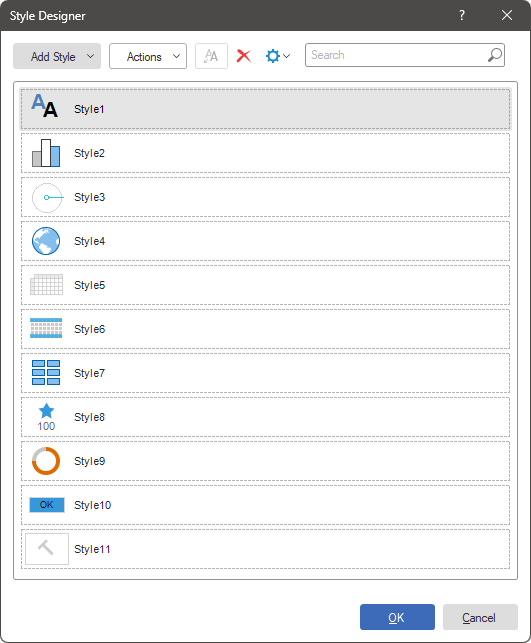
You can add or change conditions to apply styles in the Conditions dialog. To call this window, you need to click the Browse button in the Properties panel of the Condition Properties Style Designer.


As you can see from the figure, the dialog contains one block that shows different types of conditions. Each type of condition contains the following fields: name displays the name of the condition and the elements that enable this condition. The operation type is used to select the operation selected by the calculation of the value of the condition in the latter field and specifies the value at which the operation is performed.
![]()
![]()
![]()
![]()
![]()
![]()
![]()
![]()
![]()
![]()
![]()
![]()
![]()
![]()
![]()
![]()
![]()
![]()
![]()
![]()
![]()
![]()
![]()
![]()
![]()
![]()
![]()
![]()
![]()
![]()
![]()
![]()
![]()
![]()
![]()
![]()
![]()
![]()
![]()
![]()
![]()
![]()
![]()
![]()
![]()
![]()
Note that this type of condition is included only if the "Placement" condition is met.
![]()
![]()
![]()
![]()
![]()
![]()
![]()
![]()
![]()
![]()
![]()
![]()
![]()
![]()
![]()
![]()
![]()
![]()
![]()
![]()
![]()
![]()
![]()
![]()
![]()
![]()
![]()
![]()
![]()
![]()
![]()
![]()
![]()
![]()
![]()
![]()
![]()
![]()
![]()
![]()
![]()
![]()
![]()
![]()
![]()
![]()
![]()
![]()
You can also combine different types of conditions. In this case, the style will be applied if all conditions work. That is, if you are using placement and component name type conditions, the style will only be applied if these conditions are met, and the component properties will meet two requirements: placement and naming. .. In addition, you can use multiple conditions if they contain more than one block of conditions. In this case, the component will only be used in the style if all the blocks in all the conditions are met.
Nesting level
The level of nesting is the level at which a component is subordinate to another component, a component of the same type. The first level of nesting is organized when the component is added to the report template. If you add a component and the component has no dependencies, that component becomes the first-level component of the nest.
For example, if your report has two DataBands, one of which is dependent on the second data band, then there is a second level nested dependent band and a first level nested dependent band. If the report contains three DataBands, the third is subordinate to the second band, and the second is the first band, they will be the third, second, and first level nested components. .. Also note that there can be multiple components at one nesting level, and one data band can be dependent on several bands.
It should be understood that it is not possible to create a nesting level between them, as DataBand and ReportTitleBand belong to different types of bands. The following figure outlines the level of nesting in a DataBand.


DataBands nesting level
As mentioned earlier, when a component is added to a report layout, it is given the first level of nesting. You can change the level of nesting using the master component properties. For this reason, you need to select a dependent DataBand in the Properties field.
The nesting level of the subordinated band is next to the subordinated band. If you select the third nested level DataBand, the band will be assigned to the fourth nested level. Also note that one band may be subordinate to several bands. In this case, the dependent bands have the same nesting level. The following figure shows an example of report organization with three levels of nesting.


To create a collection of styles, clickCreating a style collectionNote in the dialog that the 10th nest level is the maximum value you specify. You can use the condition to increase it to the 100th. HeaderBand, FooterBand, GroupHeaderBand and GroupFooterBand are directly related to DataBand, so the nesting level depends on the nesting level DataBand they are related. It's important to understand that the nesting level of DataBand and its associated bands is location-independent in the report.
Nest level of other bands
ReportTitleBands and ReportSummaryBand, you can only create a collection of first and second nested level styles, not a collection of third and subsequent nested level styles for these bands Is possible. In contrast to DataBand, subordination takes place at the band location on the report page.
Because the ReportTitleBand nesting level is determined, the next first (upper) band is assigned to the first nesting level and all subsequent (lower) -second nesting levels. For Report Summary Band -All bands except the last (bottom) at the first level are assigned to the second nesting level, and the last (bottom): Nesting levels are determined to be slightly different.
The following figure outlines the nesting levels for ReportTitleBands and ReportSummaryBands.


PageHeaderBands and PageFooterBands, you can create your own collection of first nested level styles.


